> ## Documentation Index
> Fetch the complete documentation index at: https://docs.visual-layer.com/llms.txt
> Use this file to discover all available pages before exploring further.
# Dataset Snapshots
> Create, restore, and clone named checkpoints of your dataset state for version control and safe rollbacks.
Snapshots provide version control for your datasets. Each snapshot captures the exact state of a dataset — media, metadata, enrichment models, clustering, tags, and labels — at a specific point in time. Every dataset starts with an automatically created snapshot, and each pipeline operation (dataset creation, media addition, re-indexing) automatically creates a new revision before it runs. Restore any snapshot to roll back changes, or clone one to create an independent copy for parallel work.
Use snapshots to:
* Save a checkpoint before re-indexing, enrichment, or bulk metadata changes.
* Roll back to a known-good state after an operation produces unexpected results.
* Clone a dataset version to test different enrichment models without affecting the original.
Snapshot **Create**, **Restore**, and **Clone** actions require the **Editor** or **Owner** dataset role. Viewers cannot perform these operations.
Snapshot **Create**, **Restore**, and **Clone** are disabled while other tasks (adding media, enrichment, re-indexing) are running. Wait for in-progress operations to complete before working with snapshots.
## Accessing the Snapshot Catalog
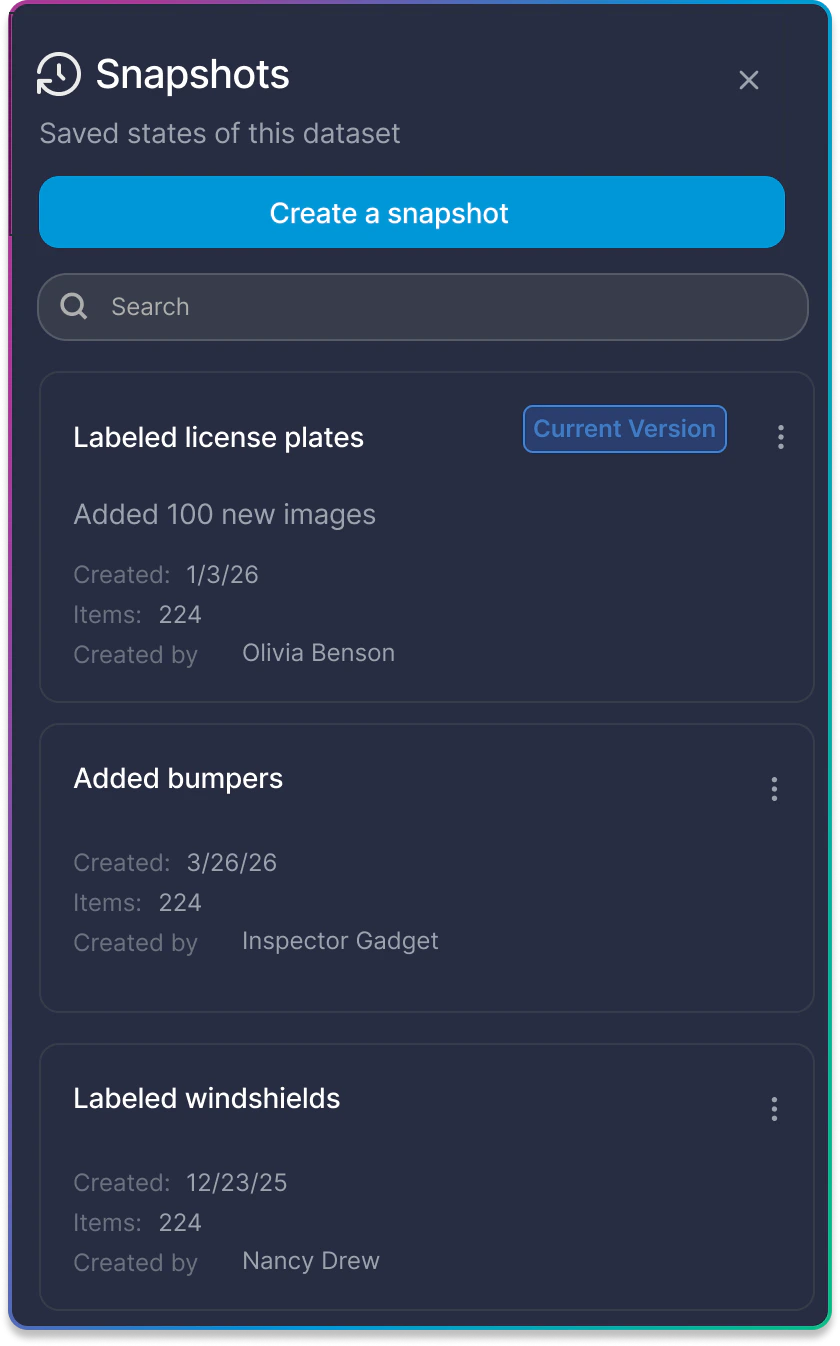
The **Snapshot Catalog** lists all saved snapshots for a dataset in chronological order.
1. Navigate to the dataset you want to manage.
2. Click the **Snapshots** icon in the dataset header toolbar.
The **Snapshot Catalog** drawer opens on the right side of the screen.
### Snapshot Catalog Fields
Each snapshot entry in the catalog displays the following information:
| Field | Description |
| ------------------ | -------------------------------------------------------------------------------------------------- |
| **Name** | The snapshot name. Editable after creation. |
| **Status Badge** | Displays **Current Version** for the active snapshot, or **Restoring** during a restore operation. |
| **Description** | Optional description text, if provided at creation. Editable after creation. |
| **Date and Time** | When the snapshot was created. |
| **Items** | Total number of images and videos in the dataset at the time of the snapshot. |
| **Created by** | The email address of the user who created the snapshot. |
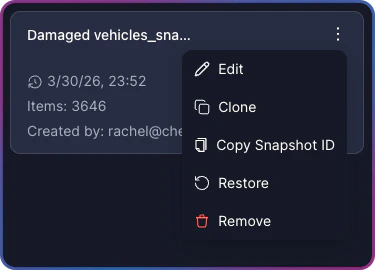
| **Three-Dot Menu** | Access to **Edit**, **Clone**, **Copy Snapshot ID**, **Restore**, and **Remove** actions. |
 Use the search bar at the top of the catalog to filter snapshots by name or description.
## Creating a Snapshot
Create a snapshot to save the current state of your dataset before making changes. Automatic revisions are created by the system before each pipeline operation and do not require user action — this procedure describes creating a snapshot manually.
1. Open the **Snapshot Catalog** by clicking the **Snapshots** icon in the dataset header.
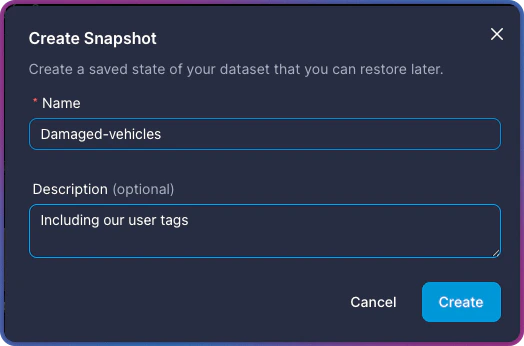
2. Click **Create a snapshot**.
3. Enter a **Name** for the snapshot.
4. Optionally, enter a **Description** to record why you created this checkpoint.
5. Click **Create**.
The snapshot is saved and appears at the top of the **Snapshot Catalog**. While the snapshot is being created, the **Snapshots** icon displays a spinning indicator.
Use the search bar at the top of the catalog to filter snapshots by name or description.
## Creating a Snapshot
Create a snapshot to save the current state of your dataset before making changes. Automatic revisions are created by the system before each pipeline operation and do not require user action — this procedure describes creating a snapshot manually.
1. Open the **Snapshot Catalog** by clicking the **Snapshots** icon in the dataset header.
2. Click **Create a snapshot**.
3. Enter a **Name** for the snapshot.
4. Optionally, enter a **Description** to record why you created this checkpoint.
5. Click **Create**.
The snapshot is saved and appears at the top of the **Snapshot Catalog**. While the snapshot is being created, the **Snapshots** icon displays a spinning indicator.
 If snapshot creation fails, a toast notification appears with the error details. The dataset returns to **Ready** status if the failure occurred in a recoverable stage. If the failure is unrecoverable, the dataset enters **Error** status.
Snapshots can only be created when the dataset is in **Ready** status. If the dataset is processing another operation, wait for it to complete before creating a snapshot.
## Restoring a Snapshot
Restore a snapshot to revert the dataset to a previously saved state. All changes made since that snapshot — including media additions, enrichment, metadata updates, and tag changes — are replaced with the data saved in that snapshot. Restoration is available for any snapshot except the one marked as **Current Version**.
1. Open the **Snapshot Catalog**.
2. Locate the snapshot you want to restore.
3. Click the three-dot menu on the snapshot entry.
4. Select **Restore**.
5. In the confirmation dialog, click **Yes** to confirm the restore operation.
The dataset enters **Read Only** status while the restore processes. A **Snapshot Restore** task appears in the **Task Manager** where you can track progress. The dataset returns to **Ready** status once the restore completes.
If snapshot creation fails, a toast notification appears with the error details. The dataset returns to **Ready** status if the failure occurred in a recoverable stage. If the failure is unrecoverable, the dataset enters **Error** status.
Snapshots can only be created when the dataset is in **Ready** status. If the dataset is processing another operation, wait for it to complete before creating a snapshot.
## Restoring a Snapshot
Restore a snapshot to revert the dataset to a previously saved state. All changes made since that snapshot — including media additions, enrichment, metadata updates, and tag changes — are replaced with the data saved in that snapshot. Restoration is available for any snapshot except the one marked as **Current Version**.
1. Open the **Snapshot Catalog**.
2. Locate the snapshot you want to restore.
3. Click the three-dot menu on the snapshot entry.
4. Select **Restore**.
5. In the confirmation dialog, click **Yes** to confirm the restore operation.
The dataset enters **Read Only** status while the restore processes. A **Snapshot Restore** task appears in the **Task Manager** where you can track progress. The dataset returns to **Ready** status once the restore completes.
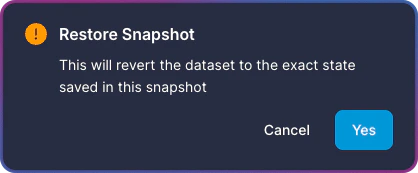 Restore replaces all current dataset data with the saved state of the snapshot. This operation cannot be undone. Create a new snapshot of the current state before restoring if you want to preserve it.
## Cloning from a Snapshot
Clone a snapshot to create a new, independent dataset from a saved state. The original dataset is unaffected.
1. Open the **Snapshot Catalog**.
2. Locate the snapshot you want to clone.
3. Click the three-dot menu on the snapshot entry.
4. Select **Clone**.
5. Confirm the clone operation in the dialog that appears.
A new dataset is created with the name **\{Original Dataset Name} (cloned)**, and an initial snapshot is created in the new dataset. A **Snapshot Clone** task appears in the **Task Manager** where you can track progress. **Restore**, **Clone**, and **Remove** are disabled on the source snapshot while the operation is in progress. The cloned dataset appears in the **Dataset Inventory** once processing completes.
Restore replaces all current dataset data with the saved state of the snapshot. This operation cannot be undone. Create a new snapshot of the current state before restoring if you want to preserve it.
## Cloning from a Snapshot
Clone a snapshot to create a new, independent dataset from a saved state. The original dataset is unaffected.
1. Open the **Snapshot Catalog**.
2. Locate the snapshot you want to clone.
3. Click the three-dot menu on the snapshot entry.
4. Select **Clone**.
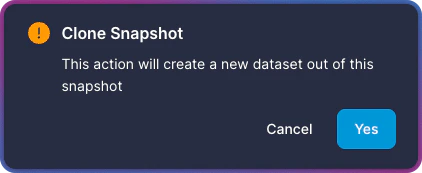
5. Confirm the clone operation in the dialog that appears.
A new dataset is created with the name **\{Original Dataset Name} (cloned)**, and an initial snapshot is created in the new dataset. A **Snapshot Clone** task appears in the **Task Manager** where you can track progress. **Restore**, **Clone**, and **Remove** are disabled on the source snapshot while the operation is in progress. The cloned dataset appears in the **Dataset Inventory** once processing completes.
 The cloned dataset is fully independent. Changes to the clone do not affect the original dataset, and changes to the original do not affect the clone.
## Editing a Snapshot
Update the name or description of any snapshot without affecting its saved data.
1. Open the **Snapshot Catalog**.
2. Click the three-dot menu on the snapshot you want to edit.
3. Select **Edit**.
4. Update the **Name** or **Description**.
5. Click **Update**.
The cloned dataset is fully independent. Changes to the clone do not affect the original dataset, and changes to the original do not affect the clone.
## Editing a Snapshot
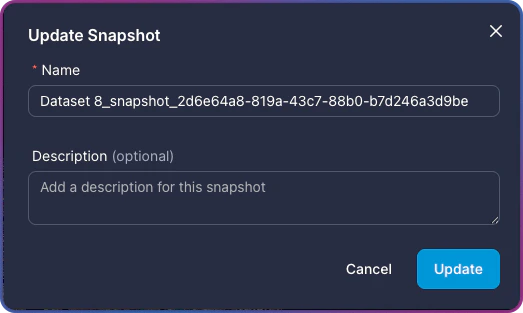
Update the name or description of any snapshot without affecting its saved data.
1. Open the **Snapshot Catalog**.
2. Click the three-dot menu on the snapshot you want to edit.
3. Select **Edit**.
4. Update the **Name** or **Description**.
5. Click **Update**.
 ## Removing a Snapshot
Remove a snapshot you no longer need from the catalog.
1. Open the **Snapshot Catalog**.
2. Click the three-dot menu on the snapshot you want to remove.
3. Select **Remove**.
4. In the confirmation dialog, click **Yes** to confirm the removal.
The snapshot is removed from the catalog. Removing a snapshot does not affect the dataset, its current data, or any datasets previously cloned from the snapshot.
## Removing a Snapshot
Remove a snapshot you no longer need from the catalog.
1. Open the **Snapshot Catalog**.
2. Click the three-dot menu on the snapshot you want to remove.
3. Select **Remove**.
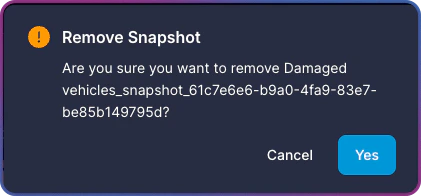
4. In the confirmation dialog, click **Yes** to confirm the removal.
The snapshot is removed from the catalog. Removing a snapshot does not affect the dataset, its current data, or any datasets previously cloned from the snapshot.
 The snapshot marked as **Current Version** cannot be removed.
## Copying a Snapshot ID
Copy the unique identifier for a snapshot for use with the API or when contacting support.
1. Open the **Snapshot Catalog**.
2. Click the three-dot menu on the relevant snapshot.
3. Select **Copy Snapshot ID**.
The ID is copied to your clipboard.
## Navigating Between Versions
The **Snapshot Catalog** allows restoration to any snapshot, whether it was created earlier or later than the current version. This enables movement both forward and backward through the dataset history — restoring to an older checkpoint or advancing to a more recent one.
Snapshot **Create**, **Restore**, and **Clone** operations put the dataset in **Read Only** status and block all data-modifying tasks until the operation completes.
## Snapshot Limitations
Keep the following constraints in mind when working with snapshots:
* Creating a snapshot requires the dataset to be in **Ready** status. Restore and clone also accept **Partial Index** and **Error** statuses.
* Snapshot creation is blocked while another operation is running — enrichment, media addition, re-indexing, label propagation, custom metadata import, or another snapshot restore.
* Restore and clone operations put the dataset in **Read Only** status, blocking all data-modifying tasks until the operation completes.
* Clone operations run on the new dataset, so they do not block operations on the source dataset.
* The snapshot marked as **Current Version** cannot be deleted. Create a new snapshot to change the current version first.
* Snapshots are available only for datasets created with snapshot support enabled. Older datasets may not support this feature.
## Related Resources
Manage snapshots programmatically — create, list, restore, clone, and delete via the REST API.
Track snapshot restore and clone operations alongside other dataset tasks.
Export a specific version of your dataset after restoring a snapshot.
Create a snapshot before running enrichment models as a safety net.
The snapshot marked as **Current Version** cannot be removed.
## Copying a Snapshot ID
Copy the unique identifier for a snapshot for use with the API or when contacting support.
1. Open the **Snapshot Catalog**.
2. Click the three-dot menu on the relevant snapshot.
3. Select **Copy Snapshot ID**.
The ID is copied to your clipboard.
## Navigating Between Versions
The **Snapshot Catalog** allows restoration to any snapshot, whether it was created earlier or later than the current version. This enables movement both forward and backward through the dataset history — restoring to an older checkpoint or advancing to a more recent one.
Snapshot **Create**, **Restore**, and **Clone** operations put the dataset in **Read Only** status and block all data-modifying tasks until the operation completes.
## Snapshot Limitations
Keep the following constraints in mind when working with snapshots:
* Creating a snapshot requires the dataset to be in **Ready** status. Restore and clone also accept **Partial Index** and **Error** statuses.
* Snapshot creation is blocked while another operation is running — enrichment, media addition, re-indexing, label propagation, custom metadata import, or another snapshot restore.
* Restore and clone operations put the dataset in **Read Only** status, blocking all data-modifying tasks until the operation completes.
* Clone operations run on the new dataset, so they do not block operations on the source dataset.
* The snapshot marked as **Current Version** cannot be deleted. Create a new snapshot to change the current version first.
* Snapshots are available only for datasets created with snapshot support enabled. Older datasets may not support this feature.
## Related Resources
Manage snapshots programmatically — create, list, restore, clone, and delete via the REST API.
Track snapshot restore and clone operations alongside other dataset tasks.
Export a specific version of your dataset after restoring a snapshot.
Create a snapshot before running enrichment models as a safety net.