> ## Documentation Index
> Fetch the complete documentation index at: https://docs.visual-layer.com/llms.txt
> Use this file to discover all available pages before exploring further.
# Create a Dataset
> Creating and indexing your first dataset in Visual Layer.
This article explains how to create a new dataset.
## Prerequisites
Before you begin, make sure you have the following:
* **Browser**
**Visual Layer** currently supports **Google Chrome only**.
* **Dataset ready**
Download [our example dataset](https://github.com/visual-layer/cartoons-dataset) or prepare your own ZIP file of images or videos.
## Tips for Efficient Dataset Management
**Use descriptive names**: Include dates, sources, or project names to make datasets easy to identify (e.g., "ProductX-Inspection-2024-Q1")
**Monitor status regularly**: Check the Task Manager for long-running operations or errors
**Organize with metadata**: Add custom metadata fields during upload to enable powerful filtering later
**Archive completed projects**: Delete datasets you no longer need to keep your inventory clean and stay within plan limits
**Save important queries as Views**: Once inside a dataset, save filter combinations as Views for quick access to specific subsets
###### To create your dataset
1. Log into **Visual Layer**.
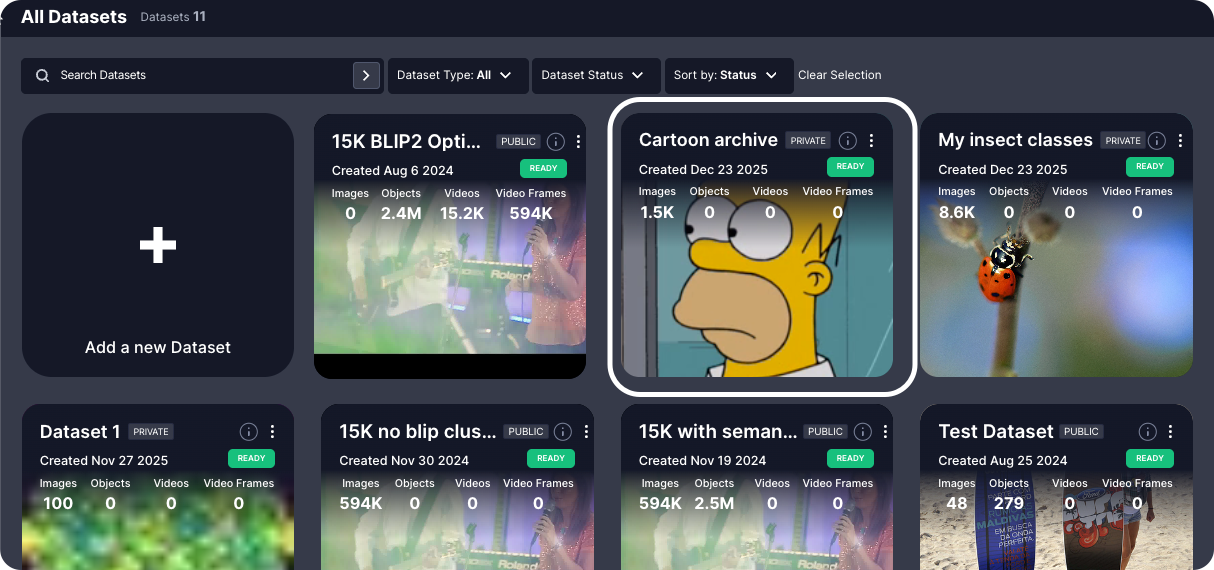
The homepage is the **Dataset Inventory**, where all datasets are managed.
2. Click **New Dataset** (or the **+** icon) to start creating your first dataset.
3. Alternatively, change the name of the dataset. We called ours Cartoon Archive.
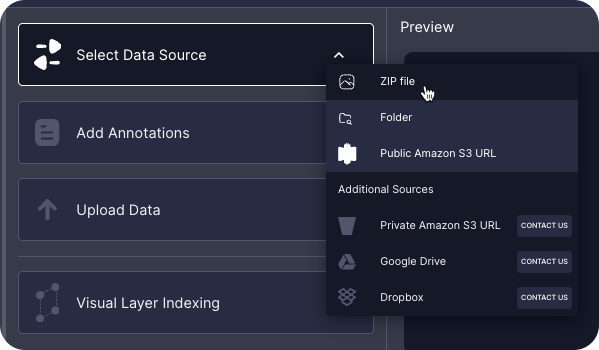
4. Choose **ZIP file** as the data source and upload the downloaded tutorial dataset ZIP file.
 5. After uploading the ZIP file, click **Add Annotations**.
If you have no annotations to include, click **Skip** to proceed without adding annotations. Otherwise, add annotations and then continue.
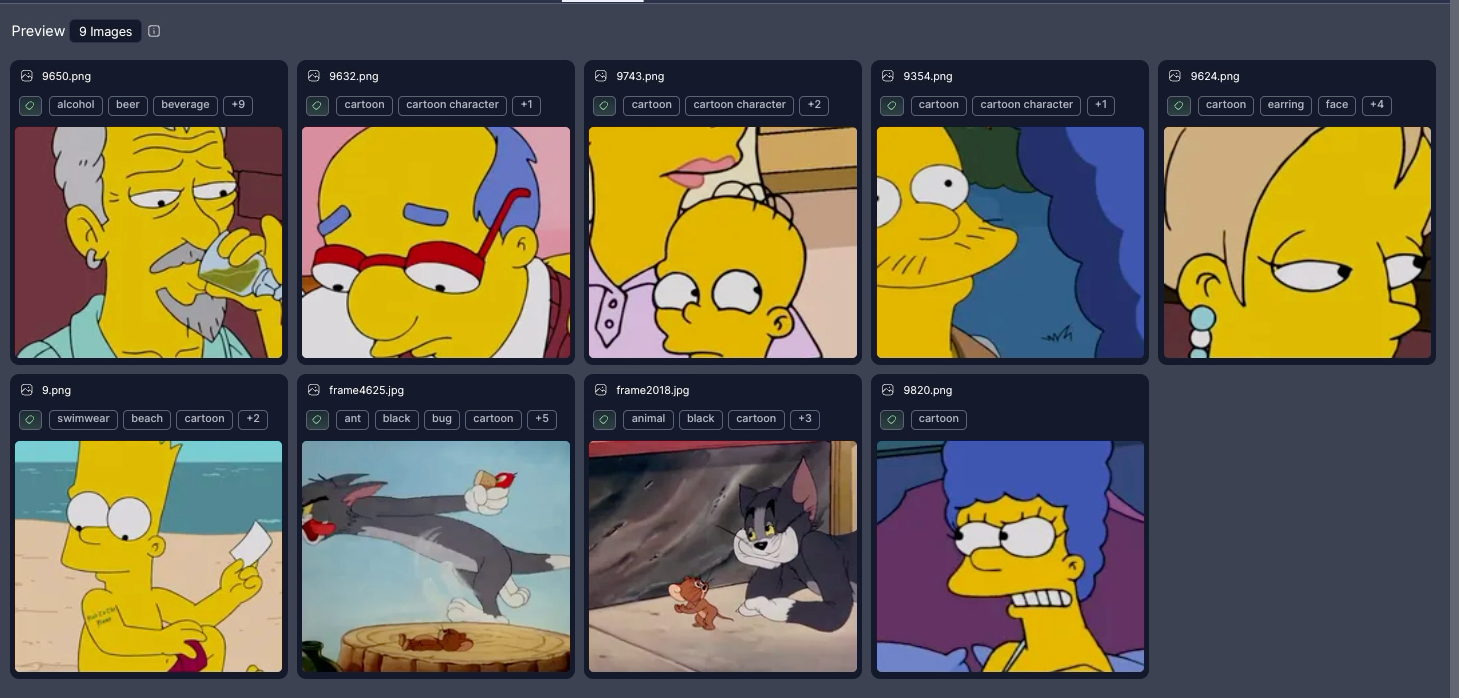
Visual Layer automatically generates a preview of the dataset.
6. Review a few sample images and videos to confirm that the data has uploaded correctly.
5. After uploading the ZIP file, click **Add Annotations**.
If you have no annotations to include, click **Skip** to proceed without adding annotations. Otherwise, add annotations and then continue.
Visual Layer automatically generates a preview of the dataset.
6. Review a few sample images and videos to confirm that the data has uploaded correctly.
 7. Click **Next** to upload and index the dataset.
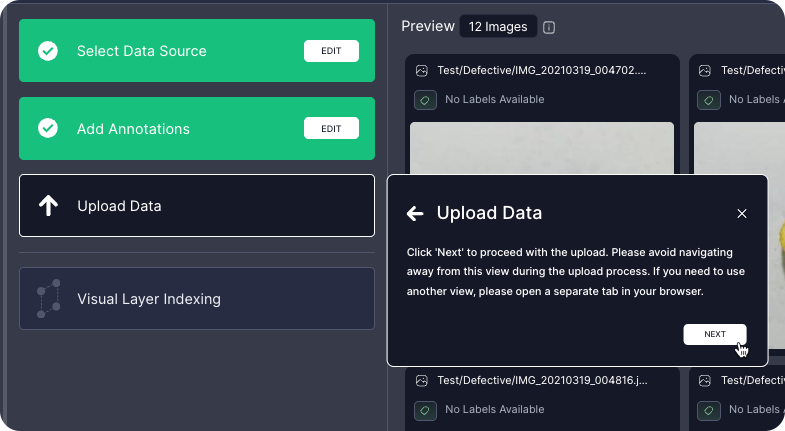 * Indexing starts automatically after upload.
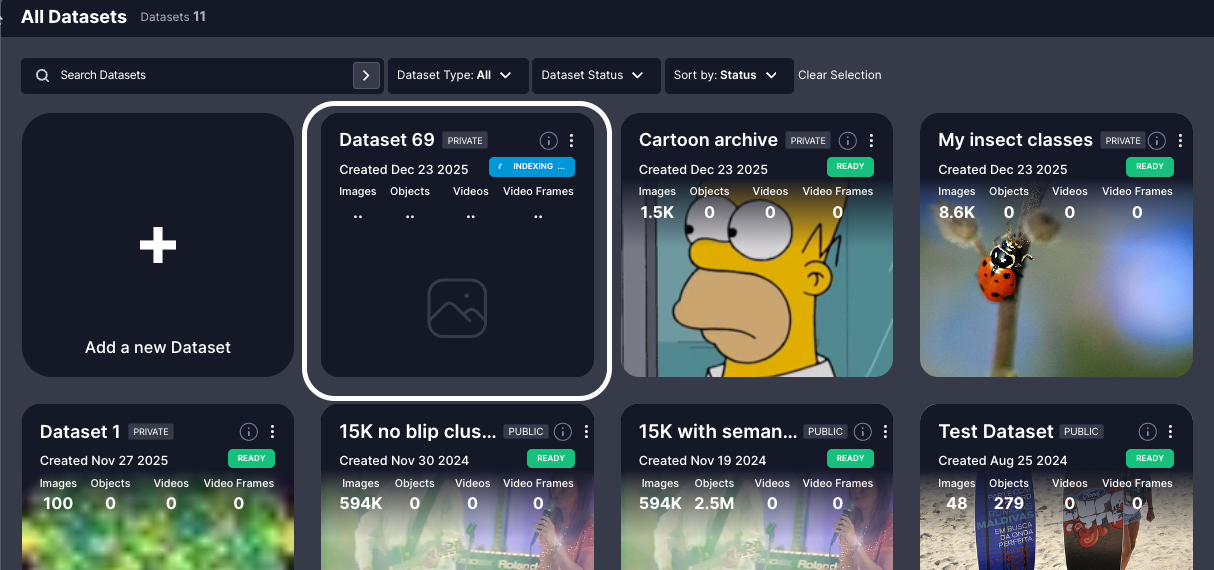
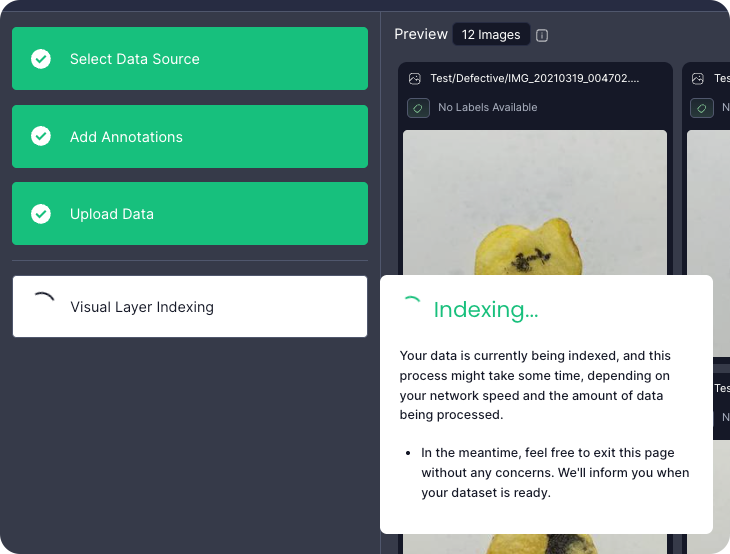 * While indexing, the dataset appears in your inventory with an "Indexing" status and shows as empty.
 * You will receive an email when indexing completes.
Keep this browser tab open until indexing starts to ensure the dataset begins processing correctly.
Once indexing completes, the dataset status changes to **Ready** in the **Dataset Inventory**.
The dataset is now fully accessible and ready to explore.
* You will receive an email when indexing completes.
Keep this browser tab open until indexing starts to ensure the dataset begins processing correctly.
Once indexing completes, the dataset status changes to **Ready** in the **Dataset Inventory**.
The dataset is now fully accessible and ready to explore.