
- Save a checkpoint before re-indexing, enrichment, or bulk metadata changes.
- Roll back to a known-good state after an operation produces unexpected results.
- Clone a dataset version to test different enrichment models without affecting the original.
Snapshot Create, Restore, and Clone actions require the Editor or Owner dataset role. Viewers cannot perform these operations.
Accessing the Snapshot Catalog
The Snapshot Catalog lists all saved snapshots for a dataset in chronological order.- Navigate to the dataset you want to manage.
- Click the Snapshots icon in the dataset header toolbar.
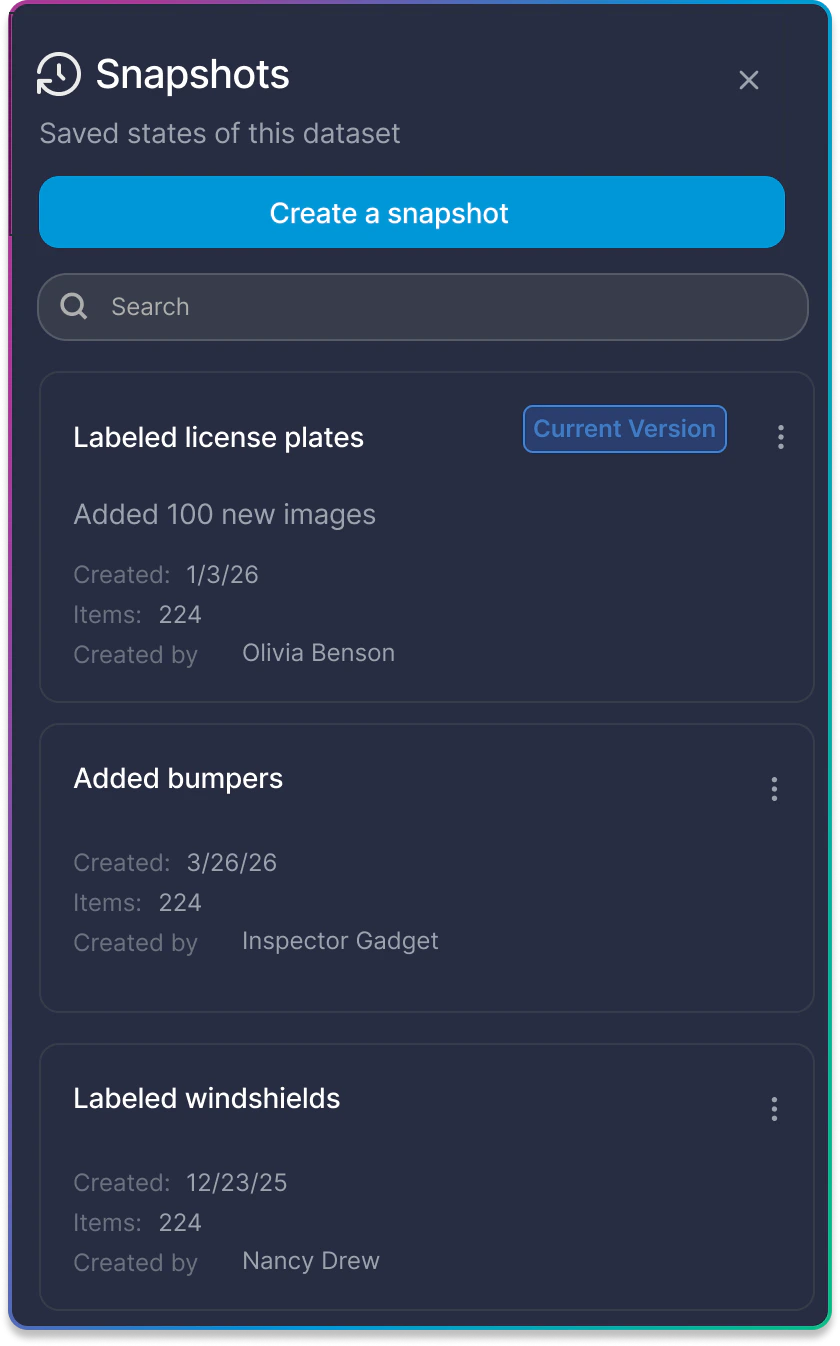
Snapshot Catalog Fields
Each snapshot entry in the catalog displays the following information: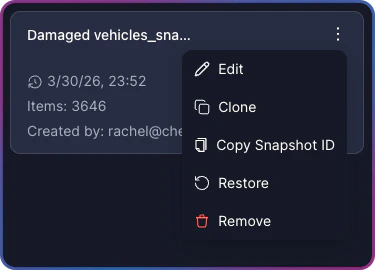
Creating a Snapshot
Create a snapshot to save the current state of your dataset before making changes. Automatic revisions are created by the system before each pipeline operation and do not require user action — this procedure describes creating a snapshot manually.- Open the Snapshot Catalog by clicking the Snapshots icon in the dataset header.
- Click Create a snapshot.
- Enter a Name for the snapshot.
- Optionally, enter a Description to record why you created this checkpoint.
- Click Create.
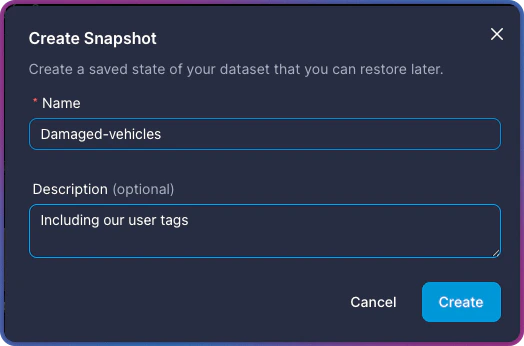
Snapshots can only be created when the dataset is in Ready status. If the dataset is processing another operation, wait for it to complete before creating a snapshot.
Restoring a Snapshot
Restore a snapshot to revert the dataset to a previously saved state. All changes made since that snapshot — including media additions, enrichment, metadata updates, and tag changes — are replaced with the data saved in that snapshot. Restoration is available for any snapshot except the one marked as Current Version.- Open the Snapshot Catalog.
- Locate the snapshot you want to restore.
- Click the three-dot menu on the snapshot entry.
- Select Restore.
- In the confirmation dialog, click Yes to confirm the restore operation.
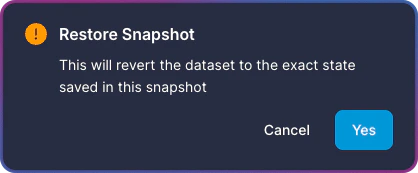
Restore replaces all current dataset data with the saved state of the snapshot. This operation cannot be undone. Create a new snapshot of the current state before restoring if you want to preserve it.
Cloning from a Snapshot
Clone a snapshot to create a new, independent dataset from a saved state. The original dataset is unaffected.- Open the Snapshot Catalog.
- Locate the snapshot you want to clone.
- Click the three-dot menu on the snapshot entry.
- Select Clone.
- Confirm the clone operation in the dialog that appears.
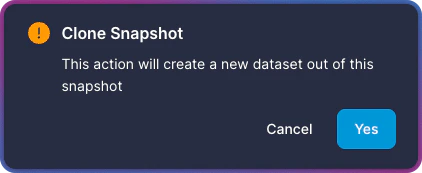
The cloned dataset is fully independent. Changes to the clone do not affect the original dataset, and changes to the original do not affect the clone.
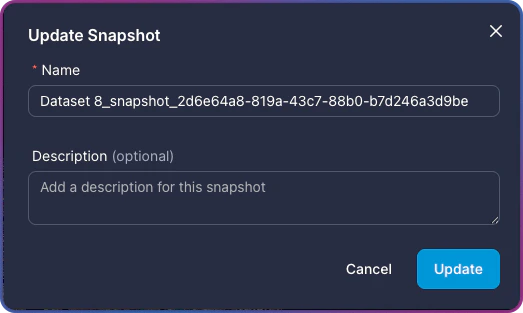
Editing a Snapshot
Update the name or description of any snapshot without affecting its saved data.- Open the Snapshot Catalog.
- Click the three-dot menu on the snapshot you want to edit.
- Select Edit.
- Update the Name or Description.
- Click Update.
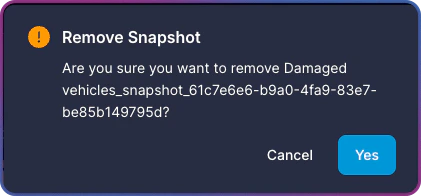
Removing a Snapshot
Remove a snapshot you no longer need from the catalog.- Open the Snapshot Catalog.
- Click the three-dot menu on the snapshot you want to remove.
- Select Remove.
- In the confirmation dialog, click Yes to confirm the removal.
The snapshot marked as Current Version cannot be removed.
Copying a Snapshot ID
Copy the unique identifier for a snapshot for use with the API or when contacting support.- Open the Snapshot Catalog.
- Click the three-dot menu on the relevant snapshot.
- Select Copy Snapshot ID.
Navigating Between Versions
The Snapshot Catalog allows restoration to any snapshot, whether it was created earlier or later than the current version. This enables movement both forward and backward through the dataset history — restoring to an older checkpoint or advancing to a more recent one.Snapshot Create, Restore, and Clone operations put the dataset in Read Only status and block all data-modifying tasks until the operation completes.
Snapshot Limitations
Keep the following constraints in mind when working with snapshots:- Creating a snapshot requires the dataset to be in Ready status. Restore and clone also accept Partial Index and Error statuses.
- Snapshot creation is blocked while another operation is running — enrichment, media addition, re-indexing, label propagation, custom metadata import, or another snapshot restore.
- Restore and clone operations put the dataset in Read Only status, blocking all data-modifying tasks until the operation completes.
- Clone operations run on the new dataset, so they do not block operations on the source dataset.
- The snapshot marked as Current Version cannot be deleted. Create a new snapshot to change the current version first.
- Snapshots are available only for datasets created with snapshot support enabled. Older datasets may not support this feature.
Related Resources
Snapshots API
Manage snapshots programmatically — create, list, restore, clone, and delete via the REST API.
Task Manager
Track snapshot restore and clone operations alongside other dataset tasks.
Export Dataset
Export a specific version of your dataset after restoring a snapshot.
Enrichment
Create a snapshot before running enrichment models as a safety net.