
- Preserve complex filter combinations for repeated use without manual reconfiguration
- Track how result counts change over time as new media enters the dataset
- Receive alerts when new data matches your filter criteria
- Share filtered perspectives with collaborators for coordinated review workflows
- Views do not duplicate or store data. They act as persistent filter definitions.
- Views are dataset-specific and visible to all collaborators with access to that dataset.
- Views are immutable. To change the view filters, delete it and create a new one.
- Monitoring tracks result changes over time. Alerting notifies you when new matches appear.
Creating a View
Save any active filter combination as a named view.- Open a dataset and apply filters, search queries, or similarity conditions in the Explore tab.
- Click Save View in the Filter Panel.
- Enter a descriptive name for the view.
- Click Save.
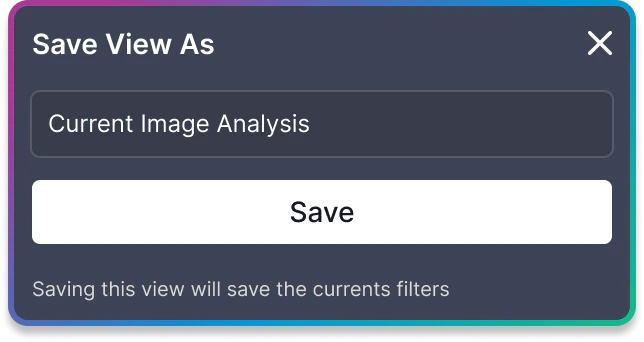
View names must be unique within a dataset. If a name already exists, an error message appears and the Save button is disabled.
What Gets Captured
A saved view records the complete filter state at the moment of creation:- Text and semantic search queries
- VQL (Visual Query Language) filters
- Label and tag selections
- Quality issue filters (duplicates, outliers, mislabels)
- Entity type (images, objects, or video frames)
- Similarity thresholds
- Metadata source filters
- Folder path filters
Accessing Saved Views
Saved views are accessible from two locations.From the Explore Tab
Click Save View in the Filter Panel to open the views dropdown. The dropdown lists all saved views for the current dataset. Click any view name to load its filters into the current exploration session. The currently active view appears first in the list. Click it again to clear the view and return to unfiltered exploration. A See all views link at the bottom of the dropdown navigates to the Views tab for the full views list.From the Views Tab
Navigate to the Views tab from the dataset header. The Views tab displays all saved views in a table with detailed information and management options.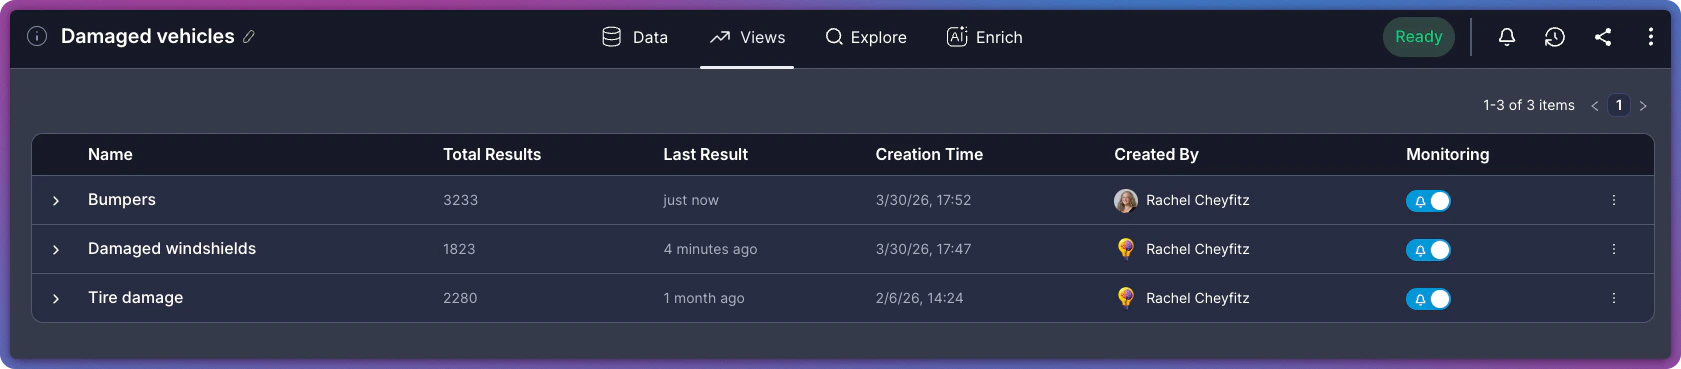
Views Table Columns
The Views tab table displays the following information for each view:Exploring a View’s Results
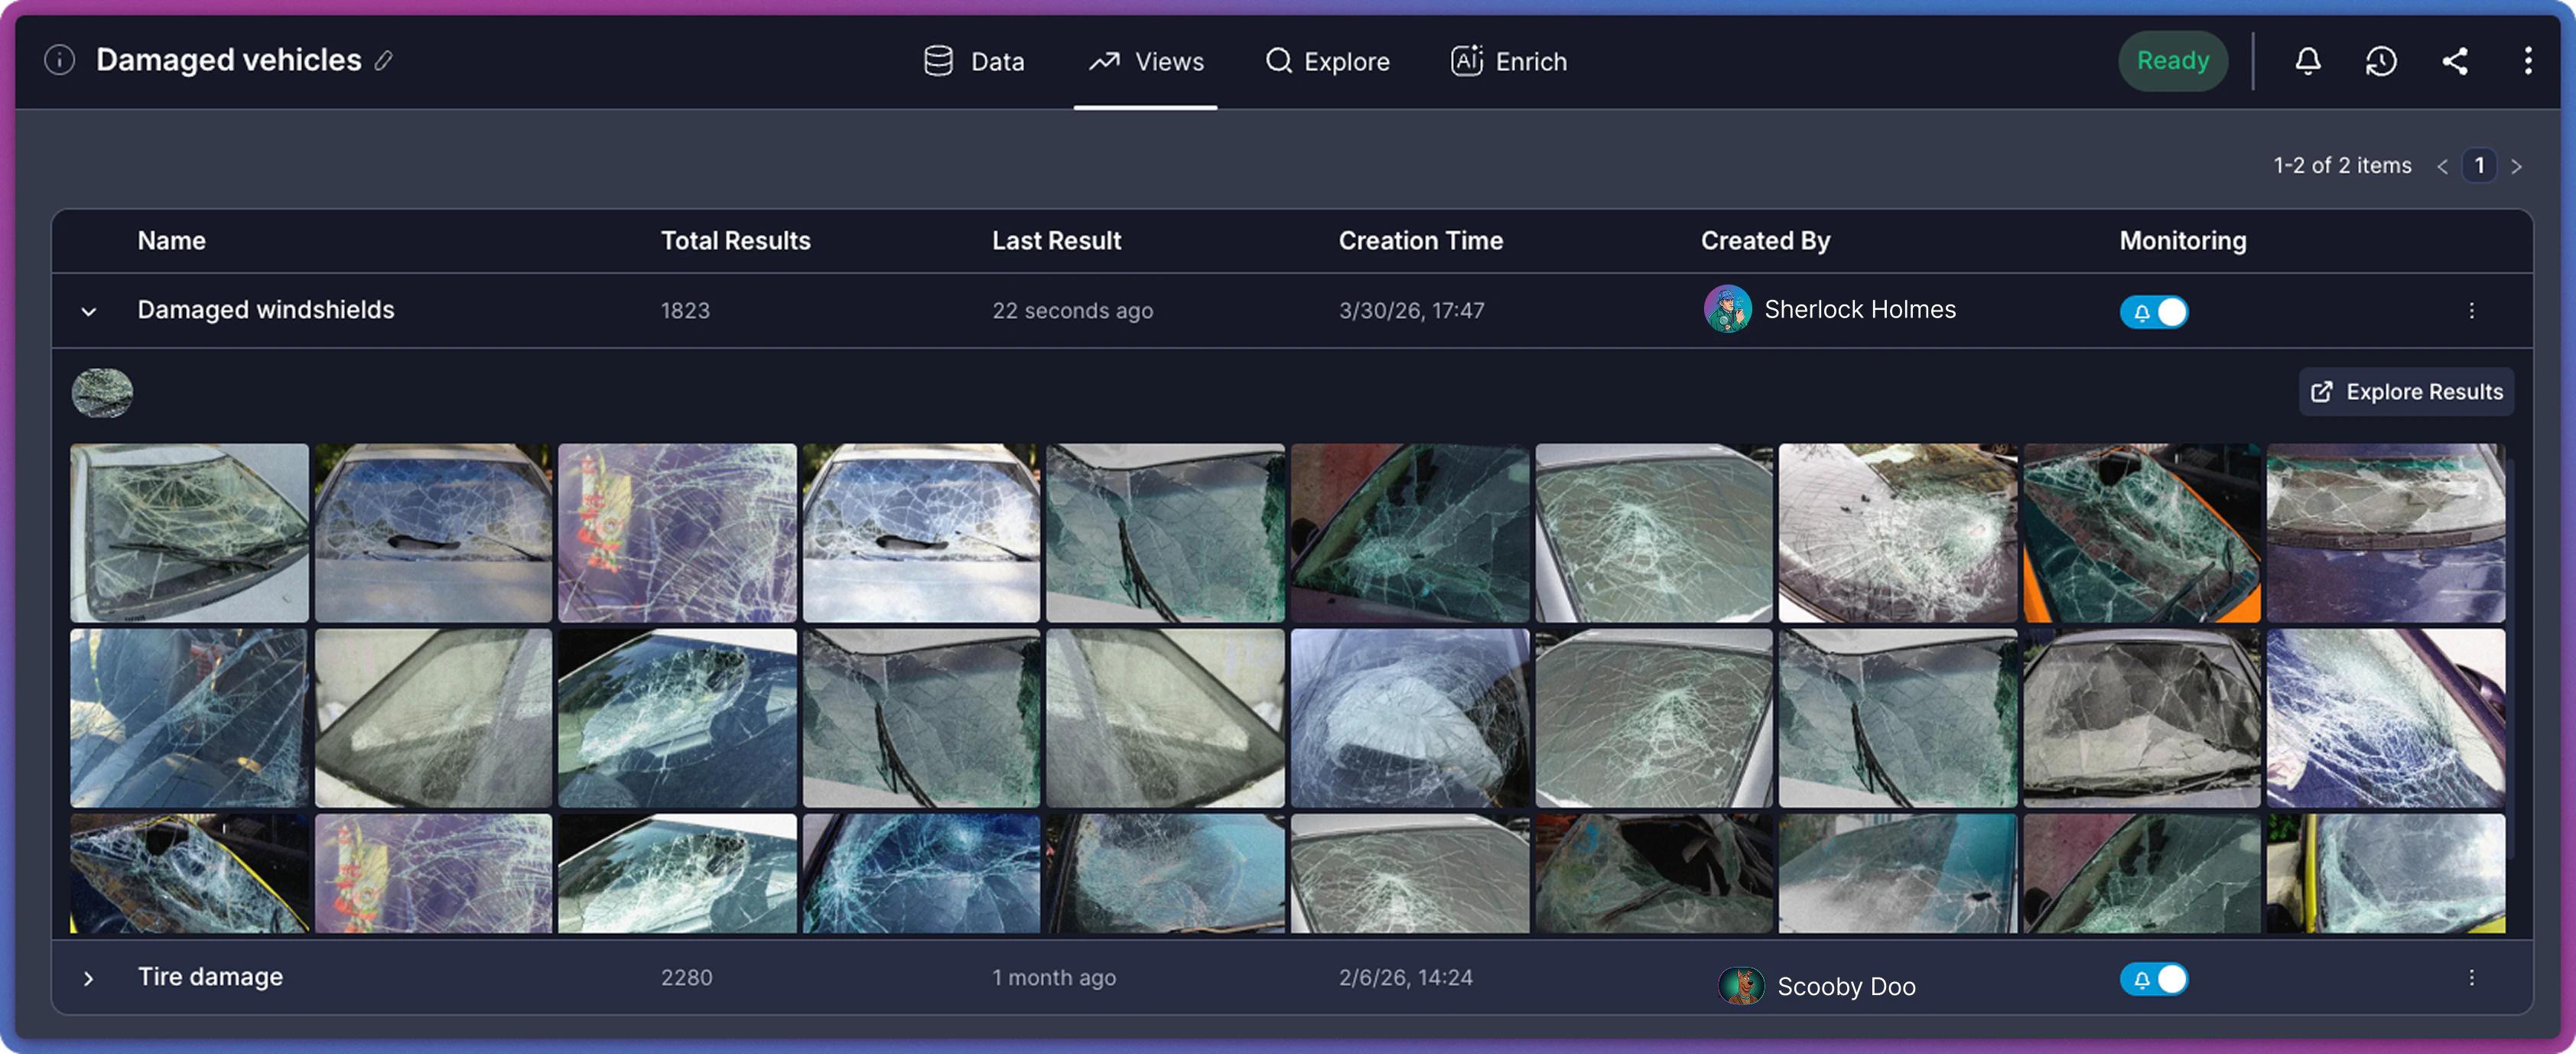
Open a saved view to see its matching results and trend data.- Navigate to the Views tab.
- Click a view row to expand it.
Query Details
A read-only display of all filters captured in the view, shown as filter badges. Click Explore Results to navigate to the Explore tab with these filters applied.Trend Results and Preview
The expanded view displays a split panel:- Trend Results (left): A bar chart showing how the result count has changed over time. The chart displays the last 8 data points with timestamps and counts. Hover over any bar to see the exact date and count.
- Preview (right): A scrollable grid of thumbnail images from the matching results.
Monitoring and Alerts
Every saved view automatically tracks how result counts change over time. Each time new media is added to the dataset, the monitoring system evaluates all views and records how many new items match each view filter criteria. This builds a trend history visible in the expanded view row. Alerting extends monitoring with real-time notifications. The Monitoring column in the Views tab controls whether a view sends alerts when new matches are detected. Click the toggle to enable or disable alerts for any view.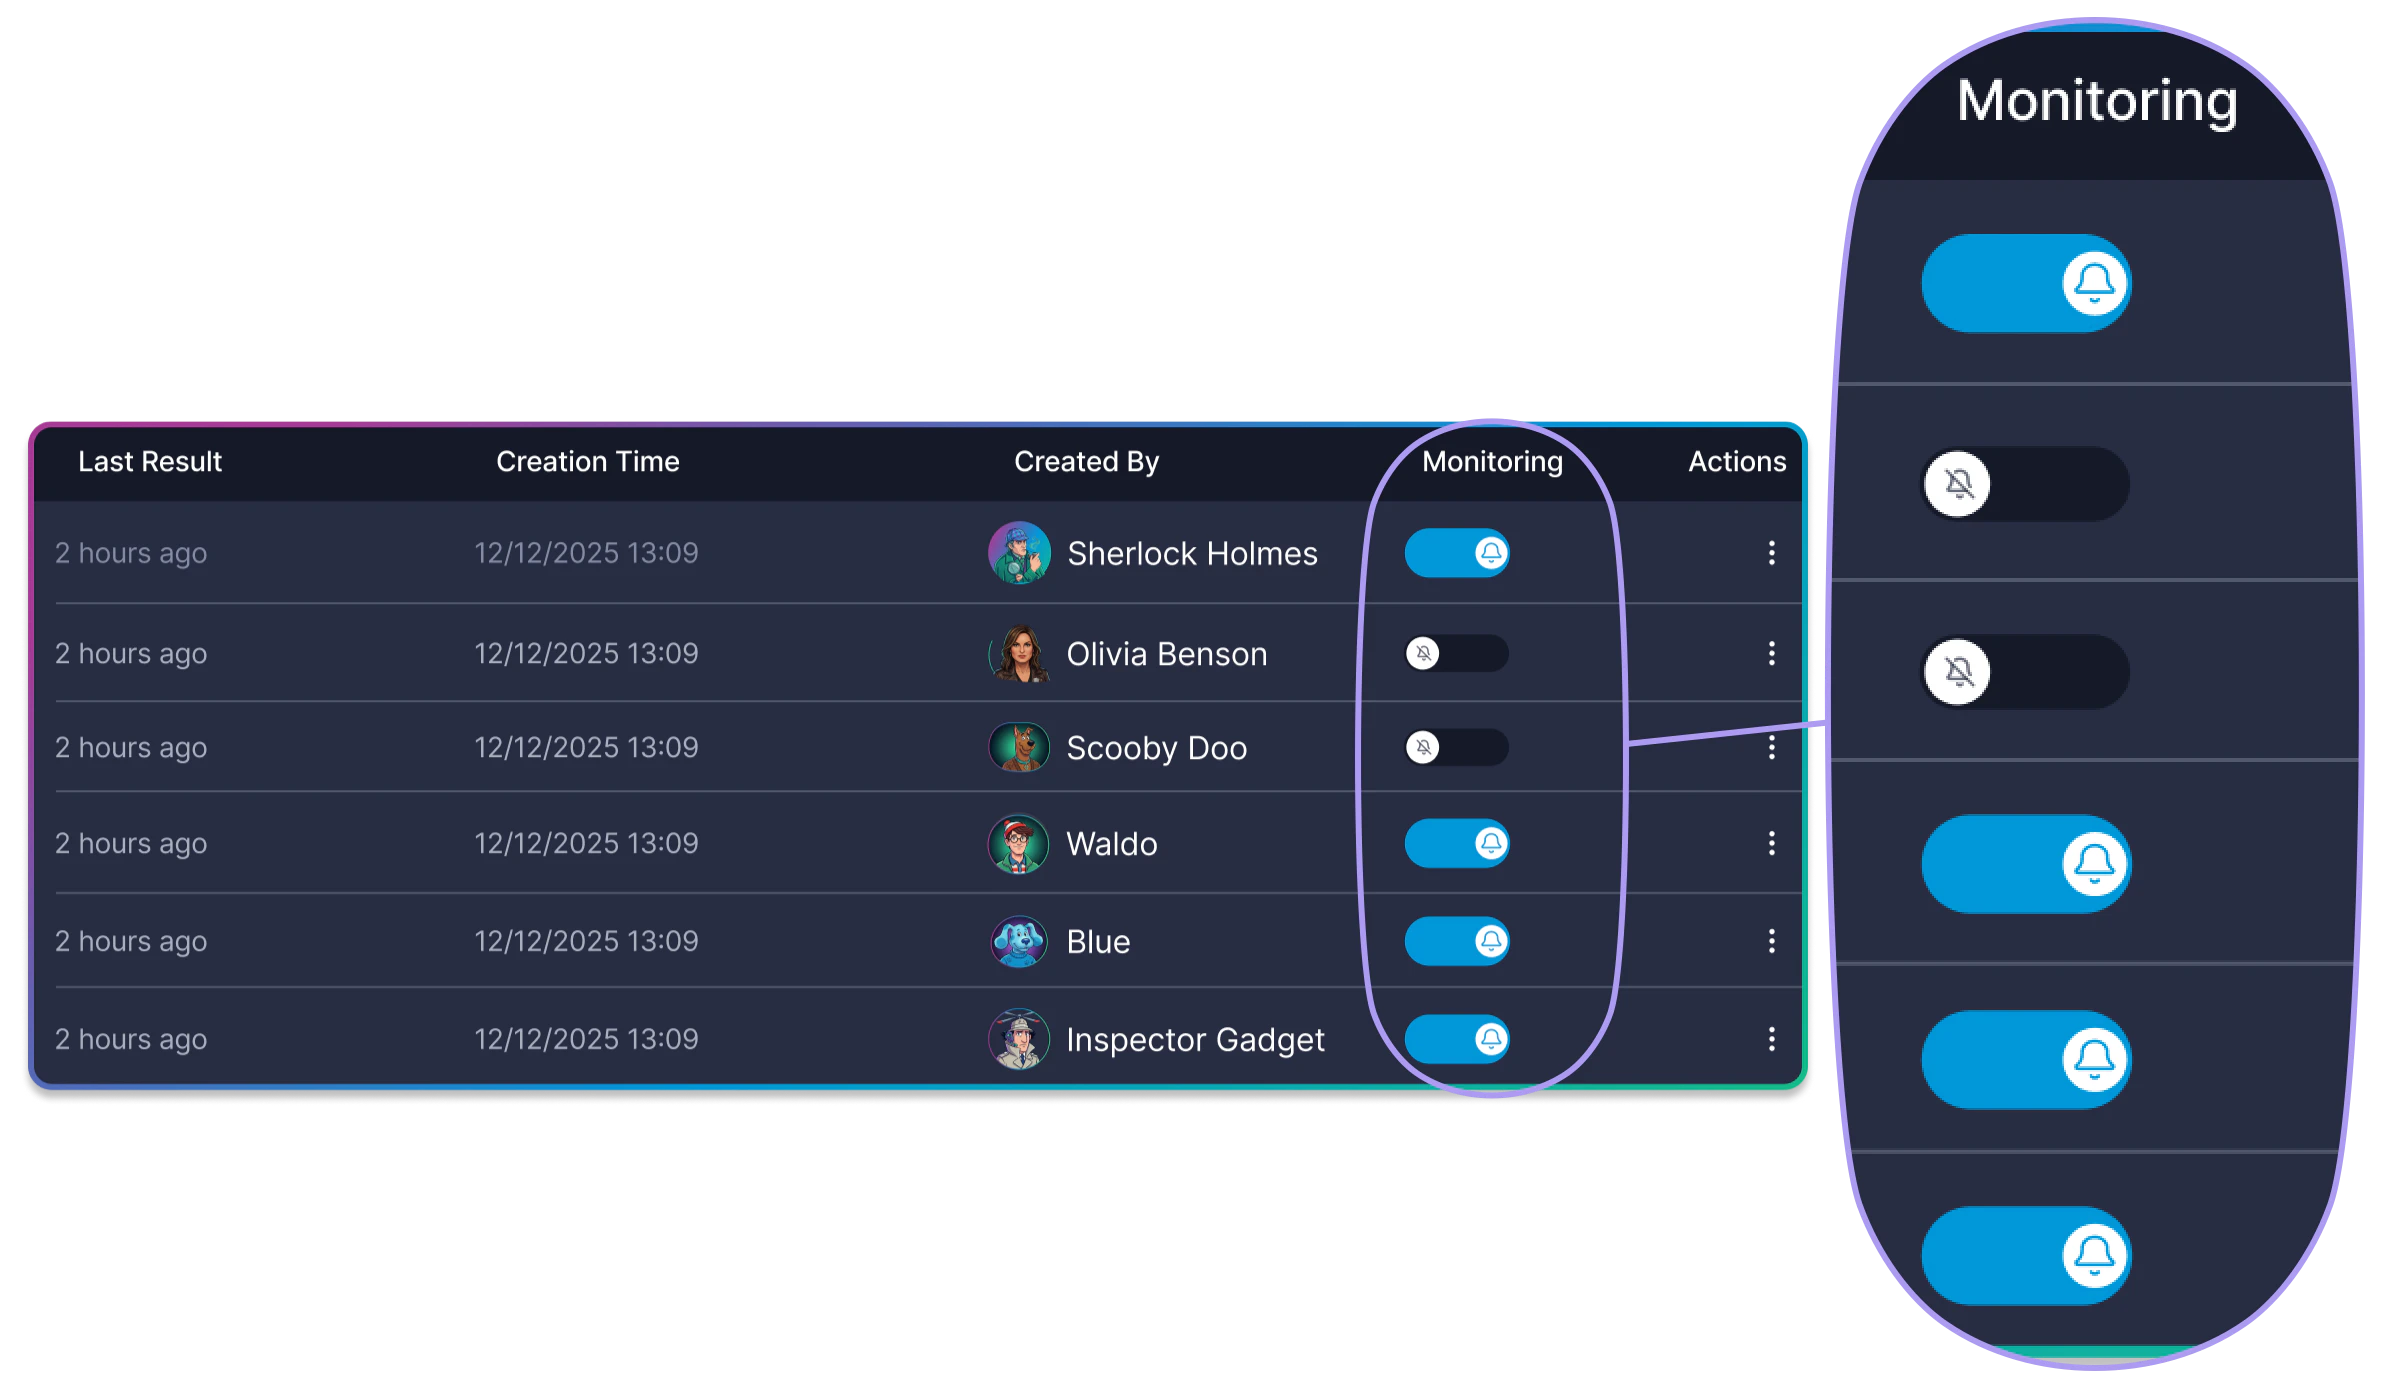
Sharing a View
Share a saved view with a collaborator by email. Sharing sends an email with the view details and a link to open it.- Navigate to the Views tab.
- Click the Share icon on the view row.
- In the Share this View panel, optionally enter a personal message (up to 250 characters).
- Enter the recipient’s email address.
- Click Invite.
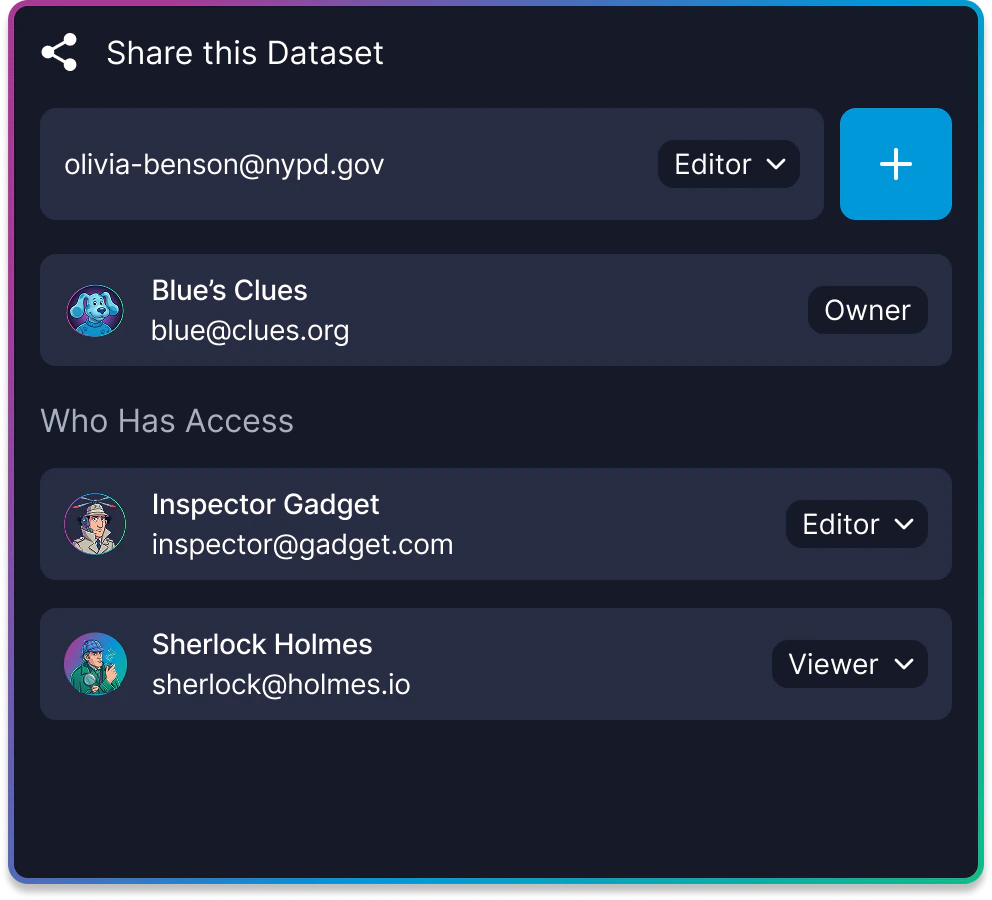
Views are accessible to all collaborators on the dataset. The share feature sends an email notification to draw a specific person’s attention to the view — it does not grant additional access.
Deleting a View
Remove a view that is no longer needed.- Navigate to the Views tab.
- Click the three-dot menu on the view row.
- Select Delete.
- Confirm the deletion in the dialog that appears.
Views are immutable. To modify the view filters, delete the existing view, apply new filters in the Explore tab, and save a new view.
Related Resources
Monitoring and Alerts
Track result trends and receive real-time alerts when new data matches your views.
Search and Filter
Build the filter combinations that drive your saved views.
Add Media via API
Add new media to trigger monitoring updates on saved views.
Saved Views API
Create, list, and delete saved views programmatically.